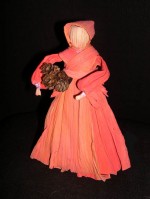
 In the fall corn husks are used for various decorations and corn husk dolls are one of my favorites. Of course, you can make them any time of year and you don’t need to grow corn and harvest your own cornhusks; you can easily find them in the super market in the Hispanic foods section (for making tamales) or in a craft store. You can use homegrown but let them dry and become straw colored before beginning.
Cornhusk dolls are a craft associated with the American Indians and there are many directions on the internet for making the basic doll. I enjoy dressing the dolls in full skirted dresses with puffy sleeves and the directions here are for such dolls. These materials will make 1 doll about 8″ tall but the size will vary with the size o the cornhusks and the way you use them.
Materials:
About 20 cornhusks, 12 as large as possible.
Twine, string, heavy thread in white or brown
One white or flesh tone pipe cleaner at least 8” long
Cornsilk, yarn, Spanish moss or other material suitable for hair (optional)
Scissors
Dye (optional; fabric dye is best but tea, coffee, food coloring, or water color paints will work)
Directions:
NB. When you finish the only ties you will see are those on the arms to form the hands so don’t worry about their appearance.
1. Soak the cornhusks in tepid water for about 10 minutes and then remove and dry on paper towels.
2. If you decide to use colored husks for the clothing, dye 12 husks (9 of them should be as wide as possible but not necessarily the longest). The dying process is the most difficult and time consuming of the project because the cornhusks do not dye easily. Heating them on the stove seemed to help but the cornhusks vary in the ability to absorb the dye and some colors are absorbed better than others.
3. Arrange the four longest cornhusks with their narrow ends together and tie tightly together with twine. Trim the sharp edges off the stubby end to make it resemble a head.
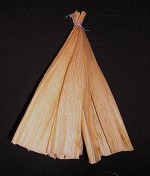
4. Turn the husks upside down pulling the long ends of the husks over the trimmed “head”. Don’t worry if the “head” is not perfectly round or attractive; you will be putting a hat on it. Tie tightly under the ‘”head” in the neck area.
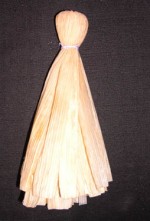
5. Lay a 7-8” piece pipe cleaner on a small husk, roll into a tight cylinder and tie tightly at each end. This will form the arms and the pipe cleaner will make the arms bendable so you can pose them as you wish. They will be covered with sleeves so don’t worry if they are not even or are very skinny.

6. Take a 5” x 5” piece of dyed husk and bunch it around the end of one arm, about 1/2” from the end of the arm. Tie securely. This will be a sleeve.

7. Pull the long ends over the tie to the middle of the arm and tie in the middle (this procedure is similar to the one you did to make the head).

8. Repeat on the other side with a 2nd piece of husk.

9. Insert the arms into the body among the husks, position them as close to the head as possible, and tie.
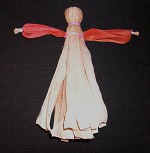
10. To make a hat, fold a piece of dyed husk over the head, folding in the back, and tie in the back. Roll a narrow (1/2″ x 5″) piece of dyed husk and tie it in the back to cover the string.
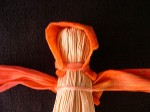
11. For the full skirt, take 8 wide dyed husks and bunch them around the torso with the narrow ends at the waist and the wide ends extending over the head. Be sure they overlap. Tie with twine.
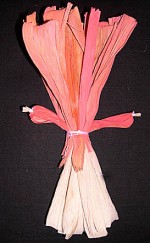
12. Pull the “skirt” husks down into position. Tie down with twine.
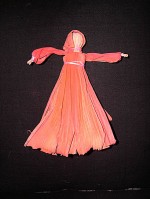
13. Cut a husk in half lengthwise, fold it in half, and drape it over the arm and diagonally across the chest and back to form a shoulder. Repeat on the other side. Tie with string. Trim the ends of these pieces like a ribbon for a decorative effect.
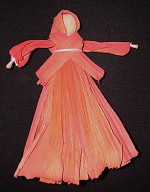
14. Roll a piece of husk as you did for the neckband, wrap it around the waist, and tie in back to cover the string.
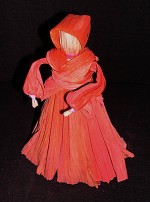
16. Add miniature accessories such as a basket of hemlock cones.
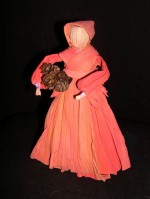
Dolls are decorated in many different ways using fabric, ribbon, lace, and a variety of accessories. Faces are traditionally left blank but sometimes two dots for cheeks or eyelashes are added to suggest features. There are really no rules for making corn husk dolls so decorate yours so that it pleases you.

Many years agi I lived in Rockville,MD,I was fortunate enough to have taken several classes with Jocelyn Mostrom, in Germantown. She was a truly talented doll maker and was able to incorporate a porcelian like face in her dolls. Unfortunately I have not been able to contact and receive a response to purchase a kit from her. She taught many classes in corn husk crafts with dried flowere. Sohappy to find you instructions, maybe it will jog my memory so I can try my hand at making these beautiful dolls again.
Thanks for your interesting comment. I enjoy collecting and making cornhusk dolls but find very little variation in those available to purchase or make. I will look out for Jocelyn Mostrom and her works.
Karen
FYI-Jocelyn retired about 5-6 years ago from her dollmaking classes and designing for Kurt Adler.
Some of us still see her regularly, but she no longer offers kits to the public.
She is in Darnstowne MD not Germantown. And she uses real porcelein doll faces and hands with many of her corn husk dolls. She dyes her own corn husks beautiful colors.