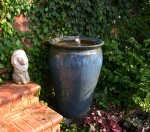
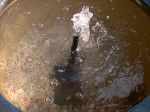
 My secret garden is a small area where my head gardener and I spend time relaxing in the evening after dark and I decided that a fountain would be a soothing addition and add immeasurably to the ambience. Space is at a premium in the secret garden and so I needed a fountain that was small and could fit in easily with the existing plants and garden ornaments. The fountain is very simple but still pretty and gives us that beautiful sound of water splashing in a pool. Because there is no catch basin, plants can be grown up close to it. The fountain can be made for under $40 plus the cost of the pot (the most expensive item.) I used a glazed container (that I found on sale) but you could use an inexpensive attractive flower pot. Here are the directions for creating this fountain.
Materials:
 Pot:
Pot:
 You will save yourself a lot of trouble if the pot has a hole in the bottom big enough to pass the plug of the pump’s electrical cord through..
 It should be large enough to hold at least 7 gallons of water.
 If hearing the water is most important buy one that is largest in the middle.
 If viewing the water is most important, buy one that is largest at the top.
 Waterproof sealer: to coat the inside of the pot if it is NOT glazed. If you don’t seal a terra cotta or concrete pot it will sweat and slowly lose water.
 Submersible pump: use the store’s guidelines to match the pump to the volume of your pot.
 ½” rigid tubing: a few inches shorter than the height of your pot.
 Silicone waterproof sealer: enough to seal the hole in the bottom of the pot after the electrical cord of the pot is inserted through it.
 Pea gravel, or other small stones: enough to fill the bottom of the pot about 3-5 inches. This will be your filter.
 Duct tape: a couple of feet to hold the electrical cord to the bottom of the pot while the sealer dries
 Three bricks: these will elevate the fountain so that the electrical cord can pass under it and up to the electrical outlet. If the pot is going to sit on the ground you could dig a shallow trench instead.
Directions:
1. Decide on the location of the pot taking into consideration:
 proximity to an electrical outlet
 levelness of the ground
2. If you have bought an unglazed pot, seal the pot by painting its inner surface with the waterproof sealer or, let it sweat.
3. If there is no hole in your pot, drill one using a bit for cement and terra-cotta. Make the hole large enough so that you can thread the electrical cord of the pump through it. (This is why you should buy a pot with a hole in the bottom!)
4. Place the pump in the pot and run its cord out the hole leaving enough in the pot so that the pump can be elevated 3-5 inches from the bottom.
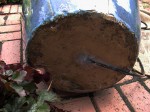
5. Tape the electrical cord in place on the outside surface of the pot’s bottom.
6. Fill the hole with silicone waterproof sealant and let it dry for at least 24 hours.
7. Test the seal by putting a few inches of water in the pot and watching for leaks. If there are leaks, try resealing the hole with the sealant until it is without leaks.
8. Add 3-5 inches of pea gravel, depending on the size of you pot while holding the pump up above it. The pump should sit on the top of the gravel.
9. Attach the tubing to the pump outlet and cut off any excess. The top of the tube should be an inch or two below the rim of the pot.
10. If you want more than just a jet of water going up, you can get a tips that will create different effects.
11. Level your fountain.
12. Fill the fountain with water up to an inch of the rim.
13. Plug the pump into an electrical outlet.
14. Sit back and enjoy the lovely sight and sounds.
15. Tomorrow, invite your friends over to admire your handiwork.